The Basic Steps of Adding Shopify Filters
- Categories :
- Free Tutorials
- Shopify
Shopify is a SAAS based fully hosted, profitable eCommerce platform to create an online store. It helps eSeller to simply build their eCommerce website to sell products without prior coding knowledge.
This popular platform always comes with upgrades that can help eSellers improve their website and further their business.
And,
At this time, it comes up with something more helpful for easy customer product discovery.
And, i.e., Upgraded Shopify filters!
See How Intellect Outsource can help with worldwide Shopify stores
- Bulk product data entry
- Product upload services
- Catalog Management
- Theme Development
This Shopify filter is for the stores that use the Online store 2.0 theme. It does not apply to the stores which are using a vintage Shopify theme.
Shopify disclosed the upgraded theme architecture for the Online Stores. This theme delivers more accessible and flexible customization options for eSellers.
In order to take full advantage of these improvements, you should plan to migrate your theme and apps to the updated requirements of Online Store 2.0.
By the end of the year, it will be required that all themes in the Shopify Theme Store and apps in the Shopify App Store use the new infrastructure.
So, suppose you are excited to use the Online store 2.0 theme and are eager to know the respective process of Shopify filters. In that case, we provide step-by-step guidance to use this filter feature on your store.
Before we start, let you know some important terms valid for filters.
Shopify provides four ways to organize your products
- Type
- Vendor
- Collection
- Tag
Each product can only have one type and one vendor. But it can have multiple tags, and it can be part of multiple collections.
You know type and vendor. But what about collections and tags?
Collections are the primary way that Shopify helps you to organize your products. These can be populated manually or automatically in terms of certain conditions.
Collections need to be set up on the Shopify admin section before a product is added to them, which in turn automatically develops a collection page on your Shopify website for that collection.
And using tags, you can create automatic collections and filter products within a collection. In addition, certain themes have a feature built-in to create tag groups by using the theme customizer.
This tutorial blog explains “How to add Shopify filters” using the Warehouse theme, which is supported by Online store 2.0.
Here are the basic steps to create filters:
A Quick Glimpse of Adding Shopify Filters
Now let's have a detailed look at the steps of adding Shopify filters:
-
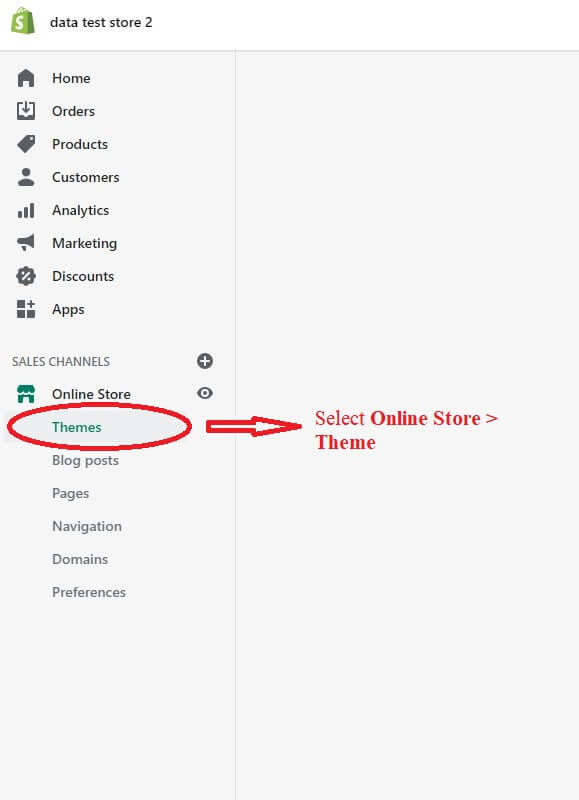
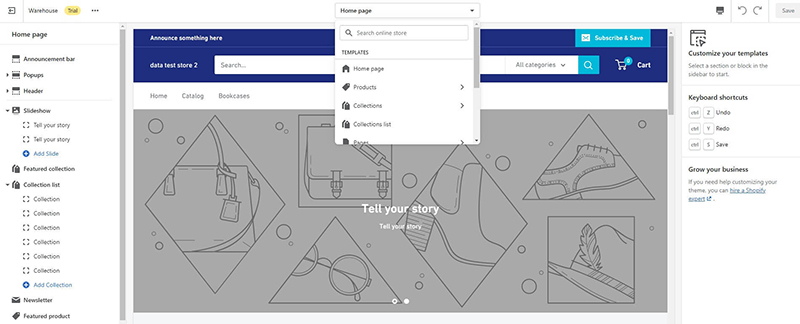
Selection of Theme
Select Online store --> Themes
Select a theme and click on the “Customize” button. Here we have selected the Warehouse theme.
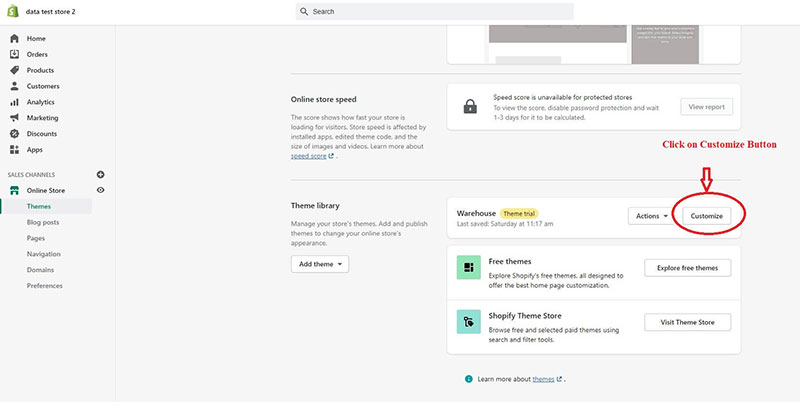
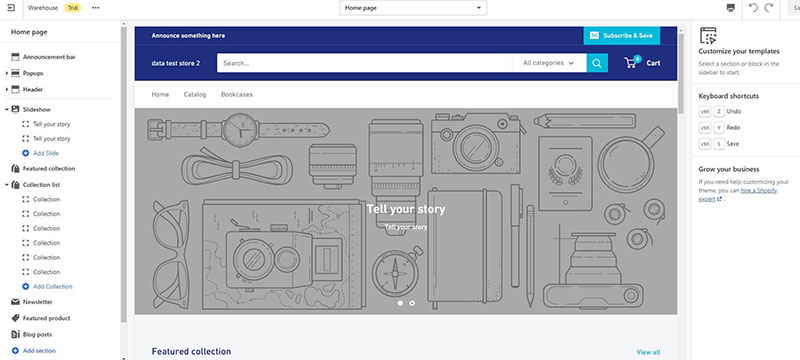
A customizer window will be opened, as shown in the figure below.
-
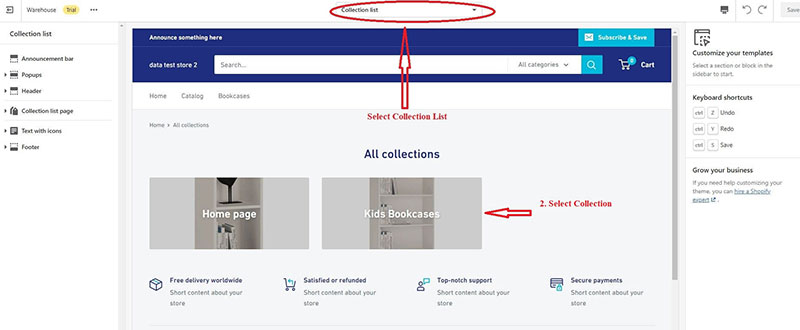
Selection of collection list
Select “Collection List” from Top dropdown
You can see all collection pages like the figure shown below.
-
Selection of collection page
Select the Collection page in which you want to add filter attributes.
-
Adding Filtering attributes
Click on “Collection Page” on the right-side menu. You can see a detailed collection page setting on the left side as of the figure shown below.
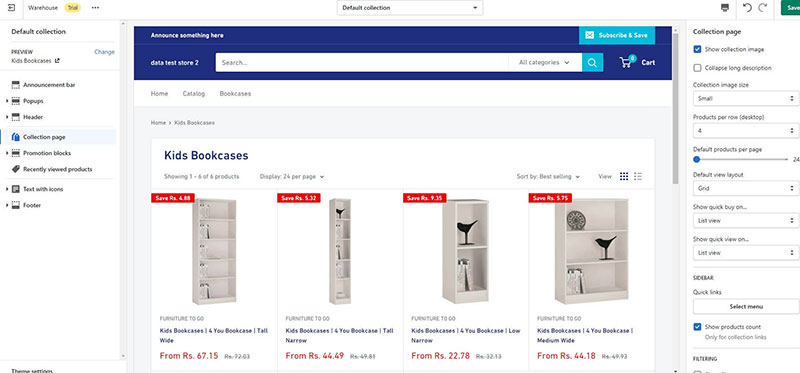
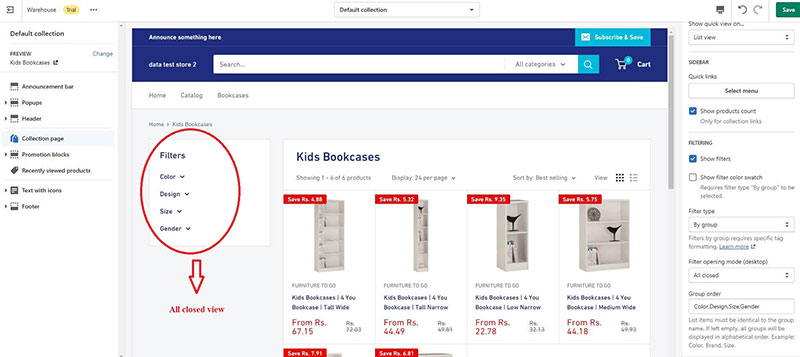
Scroll down the Collection page setting; here, you can view the filter attribute section.
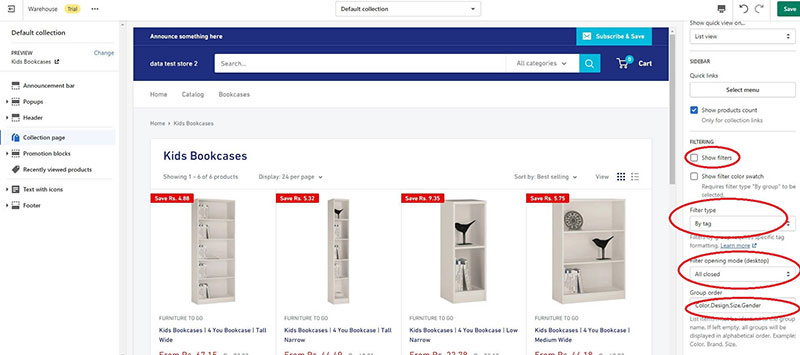
Select Filter Type? By group.
You can pick up filter type over, By group & By Tag.
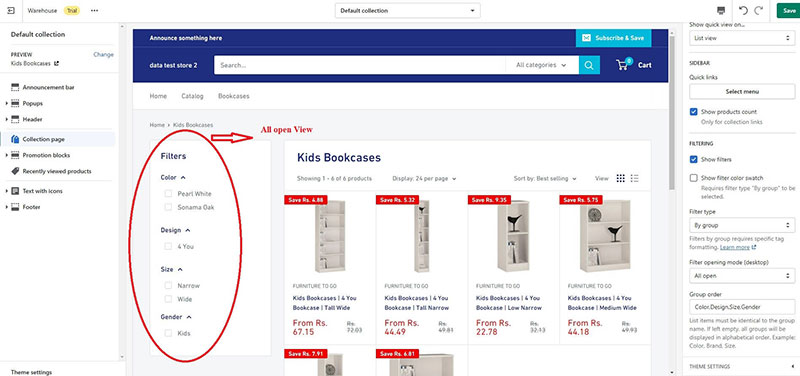
Select Filter Opening mode as per your requirement, and it can be All closed, All open, and First open. You can pick up anyone from the given options as of your choice.
Add the filter group name based on listing orders.
Also, you need to add the filter group order according to your choice, separated by a comma.
Like, Colour, Brand, Size format.
If you need to show filter color swatch, you need to tick the check box given there.
-
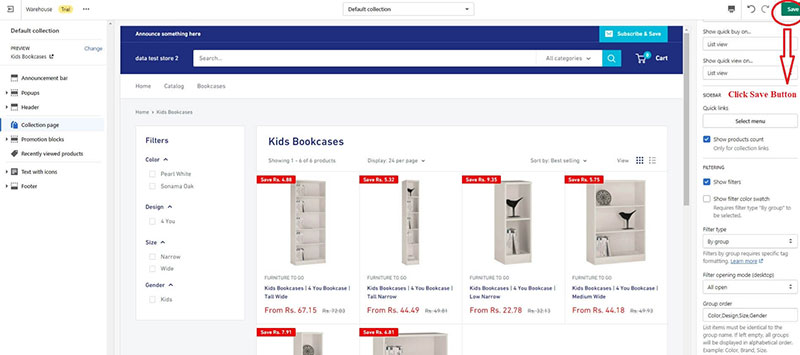
Saving changes
Save the setting by clicking the “Save” button on the left top corner. And you can see the changes you have made on the left-side filter section titled “Filters” as in the figure below.
-
Filter tag updates
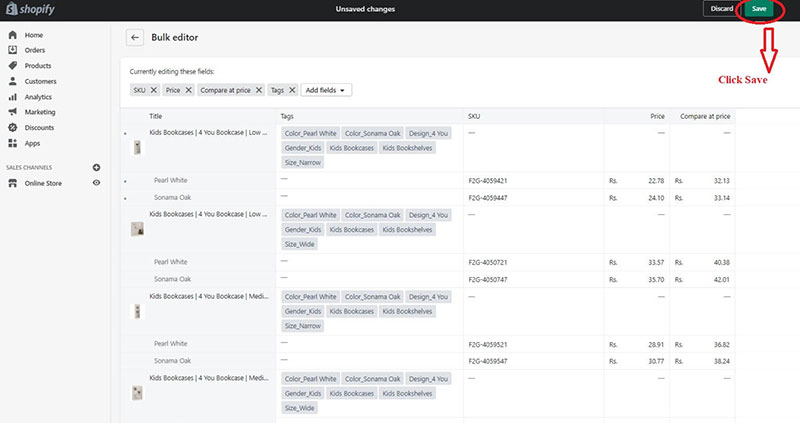
Now, go to the admin panel and select the product option. Next, select the products you want to update tags.
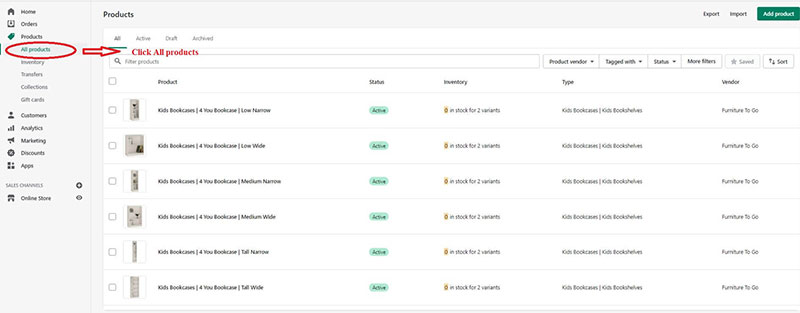
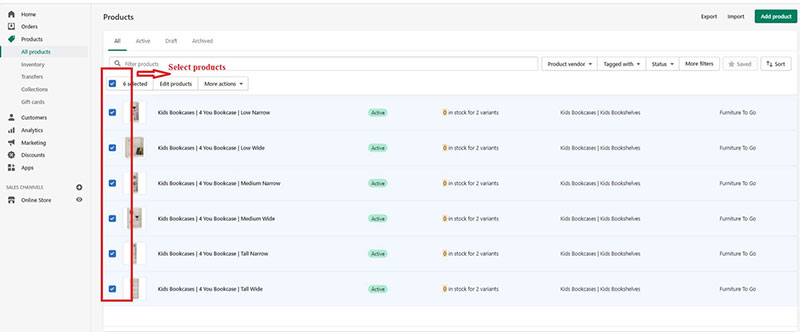
Next,
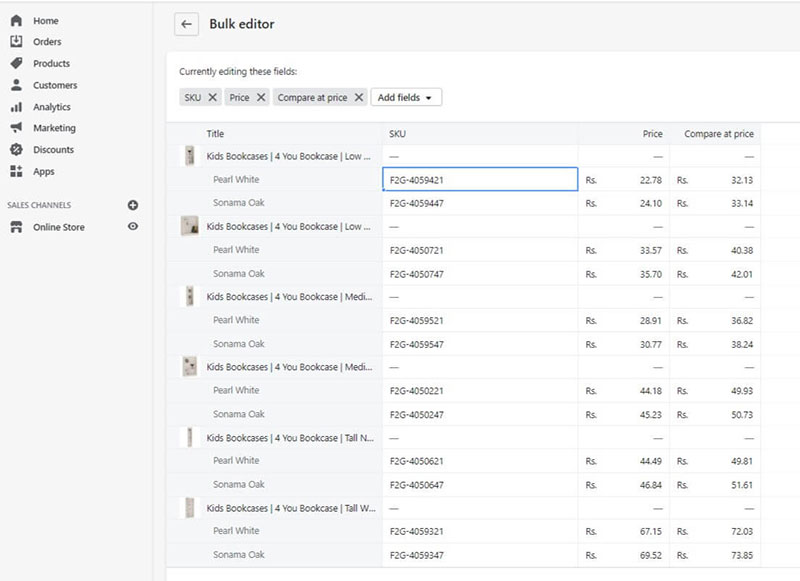
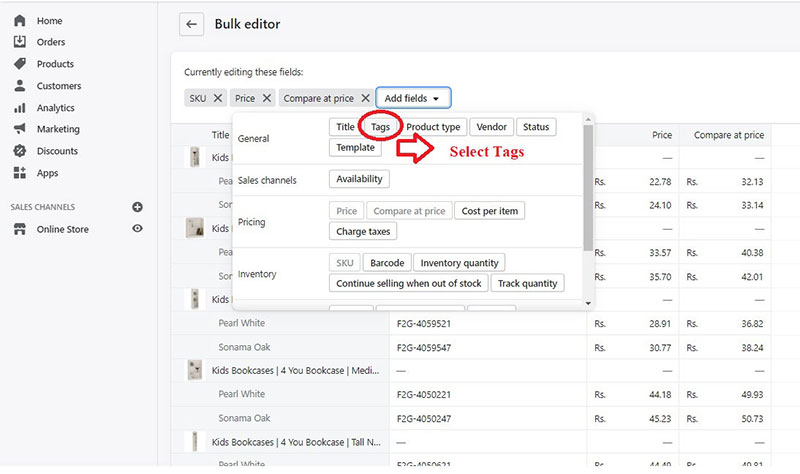
Click Add fields, then select tags. Here you will be able to update the tags for filters.
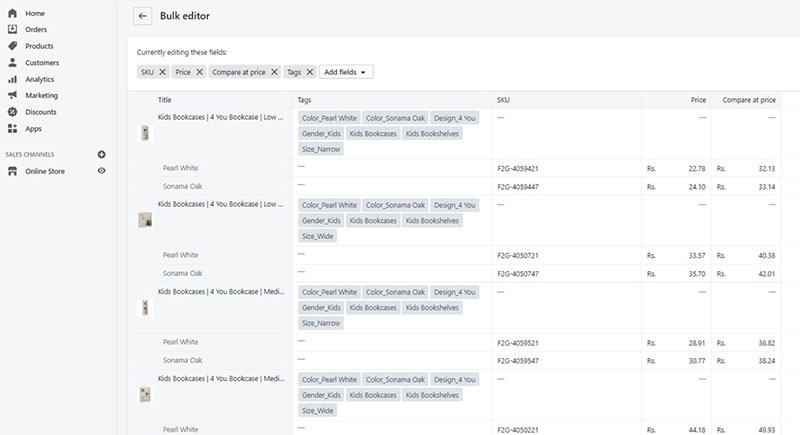
Suppose you had given the filter group order as color, design, size earlier. In that case, you need to update the filter tag as Color_Pearl White, Design_4 you, Size_Wide, and respectively. Further, the filter name and value should be separated with an underscore (_).
i.e., The filter name_value
You should mention and update all the color, design, and size for a product in this tag section. Besides, this should be repeated for all products you want to update tags in your store collection.

-
Saving tag updates
Save the changes. And go to the product section to see whether the updated changes had applied to filters properly. It will be definitely applied. And if you need further modifications to the filter tags, you can edit them as described on STEP 6 above.
Wrapping Up
With the above tutorial content about Shopify filters, you get a practical understanding of adding filters to your Shopify store as of the Online store 2.0 version. We have explained the process with the Warehouse theme.
All new Shopify stores get access to the new base theme, Dawn, by the end of the year.
Again, striking the point,
If you are presently using Shopify for your business, you need to wait till your theme developer rebuilds the themes with the new base to get the updated features.
Migrating your Shopify themes and apps to the updated requirements of Online Store 2.0 is a huge concern for eSellers.
If you want assistance managing your Shopify data entry services, you can get full-time assistance from Intellect Outsource just one click away. We are providing outstanding Shopify data management services to our clients for the last several years.
Now, Get support from an expert eCommerce team and make big changes to your e-business.

Intellect Outsource offers seamless ecommerce management services, including bulk ecommerce product data entry & product upload, online store development, virtual assistants, complete product catalog management, online store backend operation, and many more. We are here, ready to start discussing how to help you succeed in the ecommerce business. Ready to work with us?
Get regular ecommerce news directly in your inbox and link with hundreds of ecommerce entrepreneur.