How to Add Products to Shopify - Step by Step Guide
- Categories :
- Free Tutorials
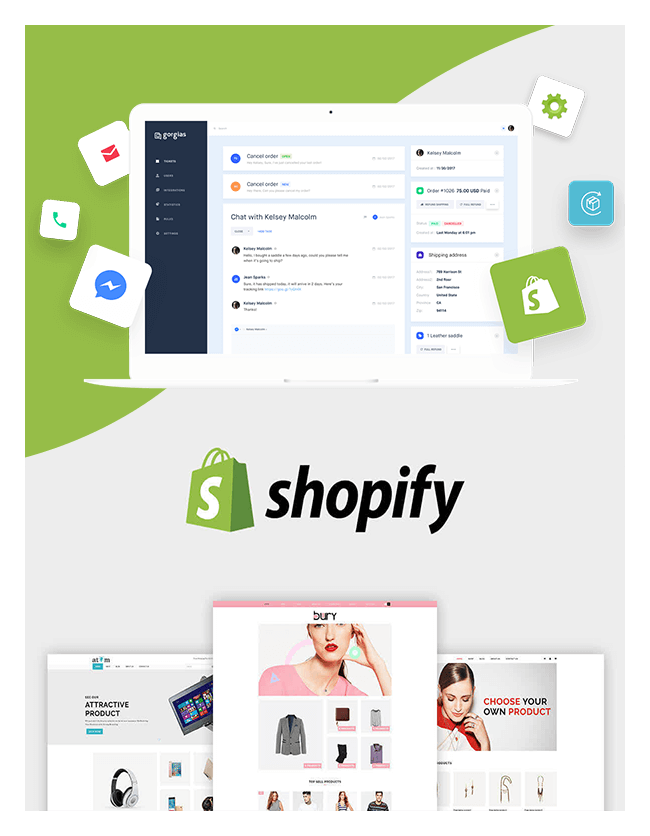
- Shopify
Shopify is one of the leading ecommerce platform that let you start, grow and manage an ecommerce business. Shopify allows anyone to setup a store and sell their products online or in person. However every beginner needs awareness about how the process can be done in shopify. Adding a product is the first step in this process.
See How Intellect Outsource can help with worldwide Shopify stores
- Bulk product data entry
- Product upload services
- Catalog Management
- Theme Development
Are you a beginner in shopify?
Let’s check, how can we add a new product in shopify!
You can add or update the information of the products as per your needs. Here we are going behind adding a new product in shopify.
Several steps to follow in order to add a new product
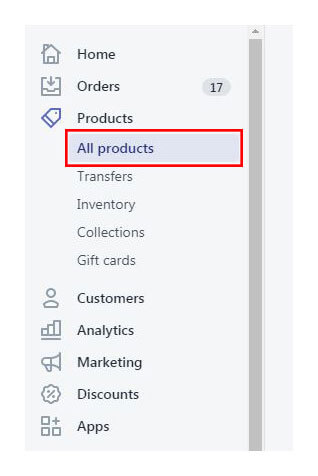
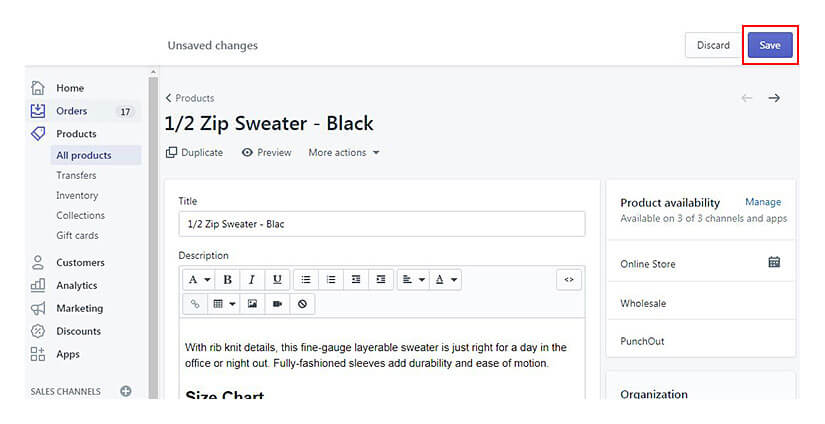
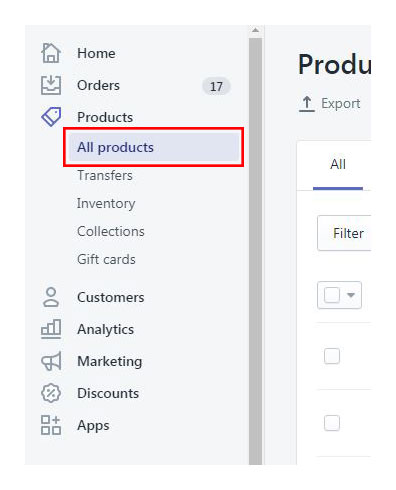
Step 1 - Choose Products Option
After logged into shopify admin, go to the navigation bar on the left side. Choose ‘Products’ option on the bar. Then choose ‘All Products’ option in the list.
Products > All products
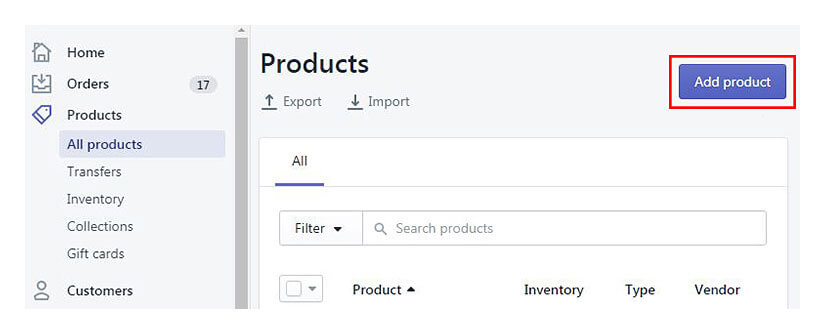
Step 2 - Add product
From the product page just click the ‘Add Product’ button on the right top
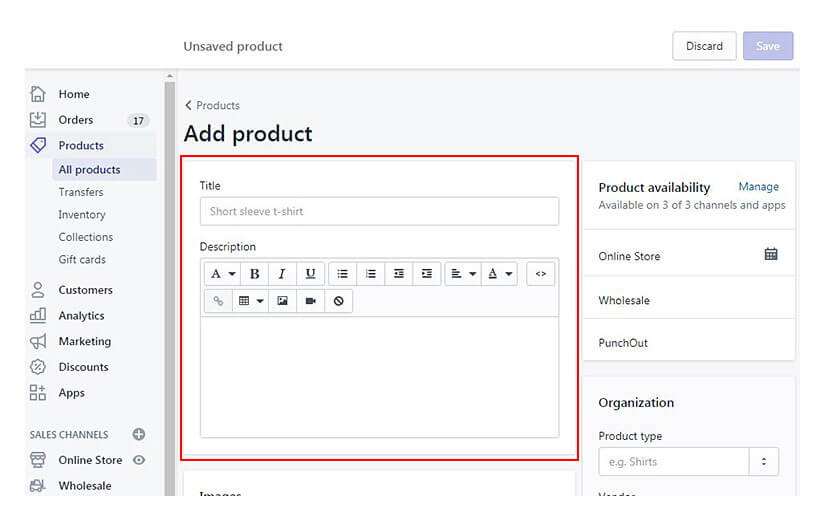
Step 3 - Enter additional details
Enter the title of the product along with the additional details.
Step 4 - Save
Click ‘Save’ button on the right top
These are the steps to add a product to shopify. You can add several additional details like Types while you add a product.
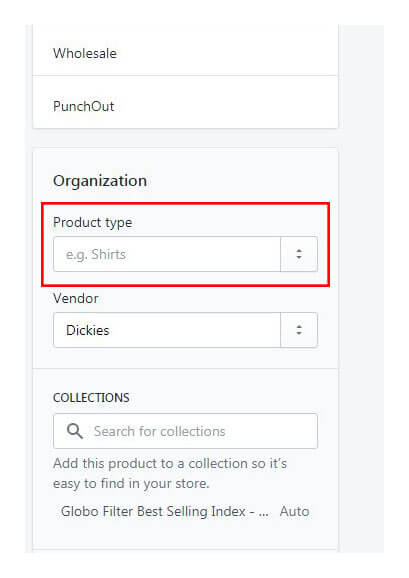
You can simply add product type by editing products one by one or else you can import it along with products, It’s far better than editing one by one.
You can similarly add Collection and Tagsjust like this. To know more check our blog below

Get our experienced team to run your Ecommerce store now
Find the simples way to tackle the complexity of selling online with Intellect Outsource.
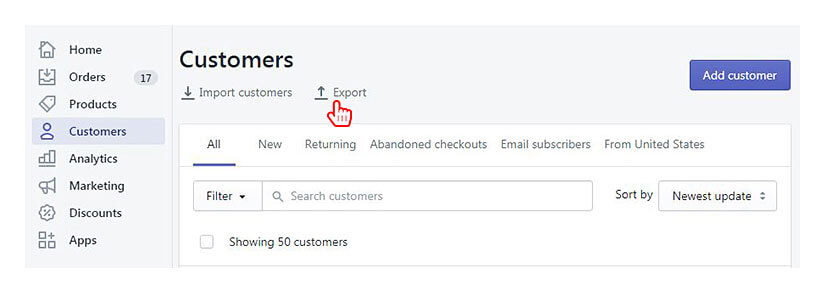
Get your free quote now !While selling these products you will gain customers and you can keep this customer DB in your store. Shopify also provides importing and exporting of customers. If you have a customer list that you want to use in Shopify, you can enter it into a customer CSV file and then import it in your Shopify admin. You can also use the customer CSV template to build a new customer list.
Several steps are there to Import/Export a customer
- Log In to your shopify account
- In the left navigation menu click ‘Customer’ option
-
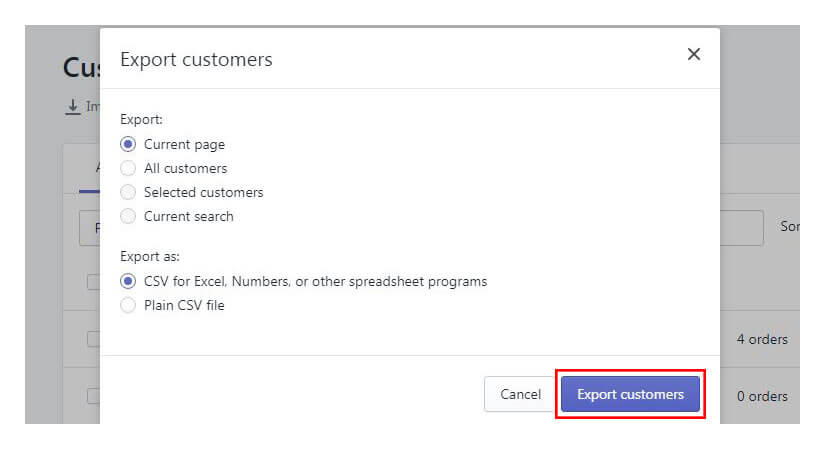
Click ‘Export/Import’ as per your need
-
You can select the option in the list as per your need and click on ‘Export Customer’. Same as in the way of importing a customer.
Adding bulk products one by one is not an easy task. It will consume more time and effort. Importing products in bulk will help you to save your time and effort.
Are you excited to know how to bulk import products into shopify store? Let’s have a look!
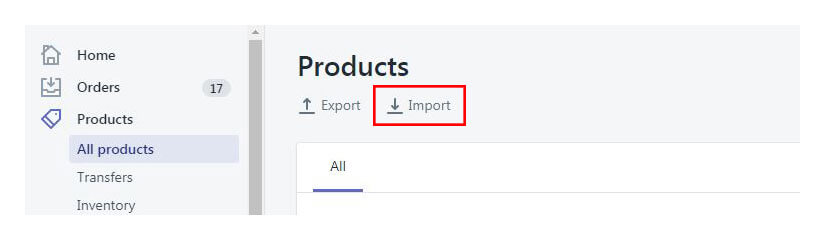
Step 1 - All Products
After logged into shopify admin, go to the navigation bar on the left side. Choose ‘Products’ option on the bar. Then choose ‘All Products’ option in the list.
Step 2 - Import
Click on the ‘Import’ button
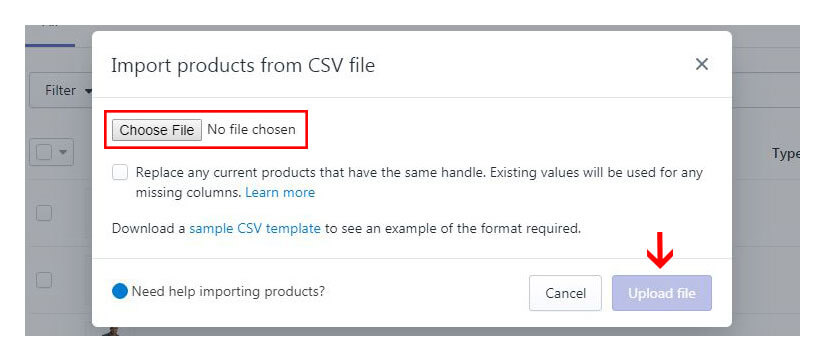
Step 3 - Choose File
Browse your desired file from your system by clicking ‘Choose File’ and after choosing it click ‘Upload File’ button.
You just have to follow only these simple steps in order to process in bulk.
Discover a multitude of benefits of using shopify comprehensive features, user-friendly interface, and robust ecosystem and also empowering your online business with streamlined management, enhanced customer experiences, and seamless scalability.
Conclusion
As a beginner to shopify, now you are aware how to start the process to ignite the engine. Adding products to your store is the first step of your task. You have already seen the methods to add products and the advantages of these methods. By choosing the bulk import, you can save your time and efforts. Intellect Outsource provides efficient low-cost ecommerce services like product data entry and ecommerce product data upload services to all global customers and help them to fulfil their needs with complete responsibility.
More details to check out the ecommerce product management services at Intellect Outsource


Intellect Outsource offers seamless ecommerce management services, including bulk ecommerce product data entry & product upload, online store development, virtual assistants, complete product catalog management, online store backend operation, and many more. We are here, ready to start discussing how to help you succeed in the ecommerce business. Ready to work with us?
Get regular ecommerce news directly in your inbox and link with hundreds of ecommerce entrepreneur.